How to run a free, decentralized, private, unstoppable marketplace with LNbits, using the NOSTR-market extension, over wss relays, with no http traffic whatsoever and even without DNS/domain
 |
|
 |
|
 |
|
 |
|
 |
|
 |
|
 |
|
 |
|
Originaly posted on Substack on Apr 14, 2023. Updated here on Dec 28, 2024.
This article was also registered with OP_RETURN at block height #785362
This is a great achievement for NOSTR and LNbits, a revolutionary protocol to be able to trade in a total decentralized way, announced by Ben Arc here.
If you are new to this and don't know what is NOSTR, start reading here: nostr.com | nostr.how /
If you are new to LNbits, never use it, never heard of it, start reading here:
The original protocol was Diagon-Alley, that later became NOSTR-Market (NIP-15).
Diagon Alley is a decentralized market-stall protocol, that shifts emphasis from the front-end market to the merchants stall. If a front-end market (indexer) gets taken down, merchants just point their stalls elsewhere. Game-theoretically the winner of Diagon Alley is the most forthright, although suggestions on limiting bad behavior are very welcome.
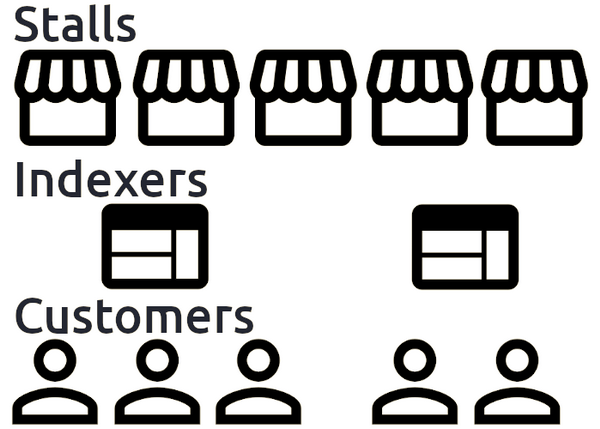
Indexers
Indexer is a simple front-end server and GUI that routes product, payment and shipping information between merchant and buyer. Each merchant has products in a stall. The stall chooses what products to list with the indexer. An indexer has one endpoint.
Stalls
A stall has a keypair it uses to register itself to indexes and sign invoices. That keypair isn't related to any Lightning Network keypair, it's independent.
A stall can choose to list some/all products with an indexer. A stall is a small server that has three endpoints.
But all that was based on http protocol, so still was depending on domain/DNS and traffic over http.
Now, NOSTR-market is build over NOSTR protocol, where all the traffic is over wss relays. HTTP access it can be optional in case the merchant want to publish a public web-shop.
But practically anybody can run a shop stall in a local instance of LNbits (on 127.0.0.1) and broadcast as notes all the items from its stall to the relays is connected.
Same as for customers, could just run a local NOSTR-client and a NOSTR-market and connect to any merchant pubkey over wss relays. Then shop freely, decentralized, anonymously with no http traffic whatsoever, using for payments the Bitcoin Lightning Network.
Let's get started!
AS A MERCHANT
Let's consider you already have installed LNbits (see the links above about LNbits). Will not enter into those details now, will make this guide too long.
A short checklist before starting with NOSTR-market:
- Get familiarized how NOSTR works and what really is. Many think that is just a Twitter replacement, but they're wrong, is much more than that. The NOSTR protocol offers many other functionalities for a more decentralized world.
- Get familiarized how LNbits works. It's an accounting system on top of a LN node / funding source. Consider it as a "wordpress" for your LN node.
- Test your LNbits instance to be working well, testing the wallets, users etc. Please read and pay attention to all LNbits documentation available on the Wiki page.
- Consider having a good funding source with good liquidity (in and out) for your LN node, connected to good LN routes and offer enough liquidity for the payments you will receive and also for swaping out the sats received. Please read, learn and get familiarized with how LN works. Here is a full list of guides and tutorials.
Step 1 - Install required LNbits extensions
A - Activate the adminUI feature
For an easy management of your LNbits server (funding sources, users, admins, install extensions etc).
To remember:
- This adminUI will create a super-admin user that is ONLY to manage the server and will be displayed only at LNbits startup, in the console log.
- It can be accessed through local URL like http://127.0.0.1/admin?usr=dfdf87.... or domain / DNS if you setup your LNbits in clearnet or over Tor also.
- Save this URL into your browser bookmarks if you like to access it more times.
- DO NOT put this URL into any search engine or post it in public !
- DO NOT use a browser like Google Chrome that also is logged in with a Gmail account. Use a decent browser that respect privacy and also do not save the history/cache (see browser options and disable that option). Every time you close the browser, will eliminate all browsing history. See more here.
- Starting with v 12.0 LNbits already have a proper login way with user and password.
B - Install User Manager (UM) extension
This is a very useful extension to manage and create users, wallets and levels of access. See more instructions here.
Login with the Super Admin user, install the UM, then create a user with its wallet too.
Login with that user and save the URL in your bookmarks. This user could be also acting as an admin user (if you give full rights in the "Manage server" section).
Inside this "admin user" you can create several other normal users, same procedure using the UM extension. But only if are needed.
With this "admin user" we are going to create the merchant and stall with the NOSTR-market extension.
C - Install NOSTR-client extension
This is a required extension for NOSTR-market, because your market needs to connect to several NOSTR relays in order to be able to broadcast your stall.
NOSTR-client is an always-on extension that can open multiple connections to nostr relays and act as a multiplexer for other clients: You open a single websocket to nostrclient which then sends the data to multiple relays. The responses from these relays are then sent back to the client.
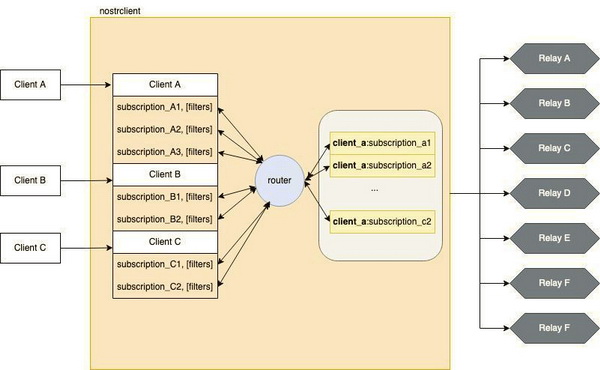
Add some NOSTR relays into the client. If you can add a proxy relay (one that is connected to many other relays) will be better to limit the sync traffic.
D - Install NOSTR-Market extension
This is the important extension you will use to create and manage your merchant profile, the stalls, products, interact with customers over NOSTR private messages, manage orders etc.
Step 2 - Configure your NOSTR-Merchant Stall and products
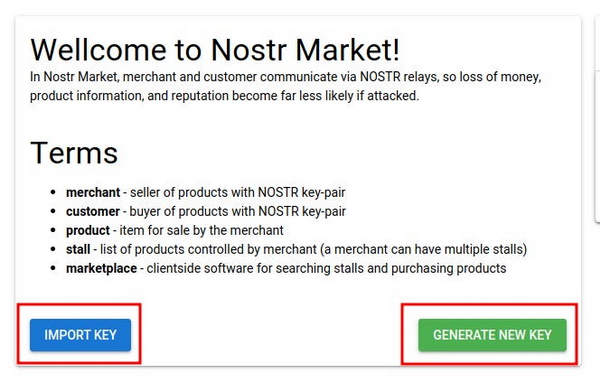
As a merchant you need to provide a Nostr key pair, or the extension can generate one for you. If you already use NOSTR for posting notes and chat you can use the same keys, to use the already created reputation and verification NIP-05. But is preferable to have a separate one for the shop and just publish into your "public NOSTR profile" the additional shop pubkey.
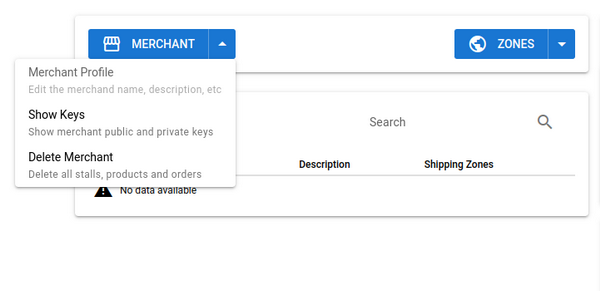
Once you have a merchant "account", you can view the details on the merchant dropdown, save the keys separately and/or announce your shop pubkey (not private key!) to your followers / customers.
SAVE YOUR PRIVATE KEY into a safe place! In case you need to migrate your LNbits NOSTR market or restore a LNbits instance to another machine, you could use that merchant private key to import your previous stall and items.
To create a stall, you first need to set a Shipping zone. Click on the Zones button and fill in the fields:
- Put your shipping zone a name
- Select to which countries does this Shipping zone applies to (you can set a "Free" zone for digital goods)
- Select the unit of account. If your will list products in USD/EUR, the shipping zone must be in the same currency
- Select the cost to ship
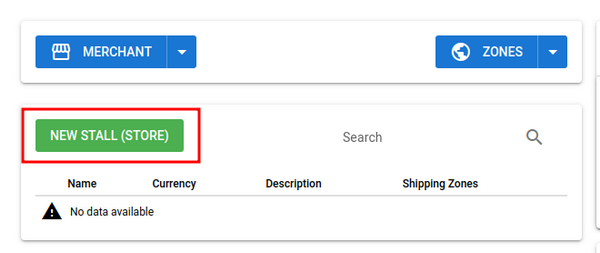
Now you can create the stall. Click on New Stall button and fill the necessary fields.
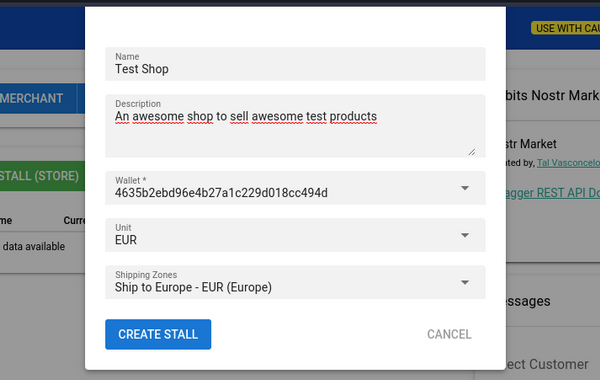
- Put your stall/shop a name
- An optional description (this can be used by client to search shops)
- Select which wallet to use for this shop
- Select the unit
- select a Shipping Zone (multiple zones can be selected)
Click on the "Plus" button to open the stall details and click "New Product" to create a product:
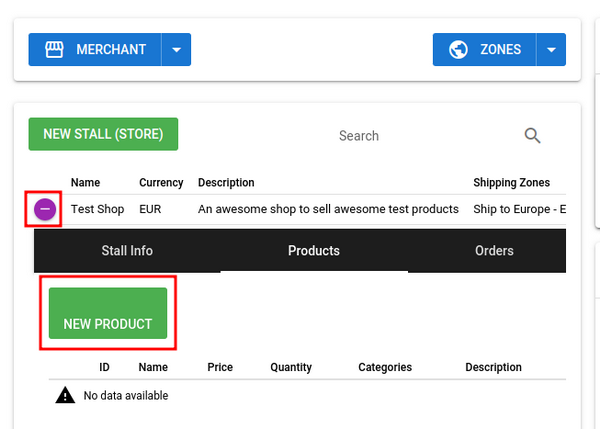
Fill the necessary fields on the dialog
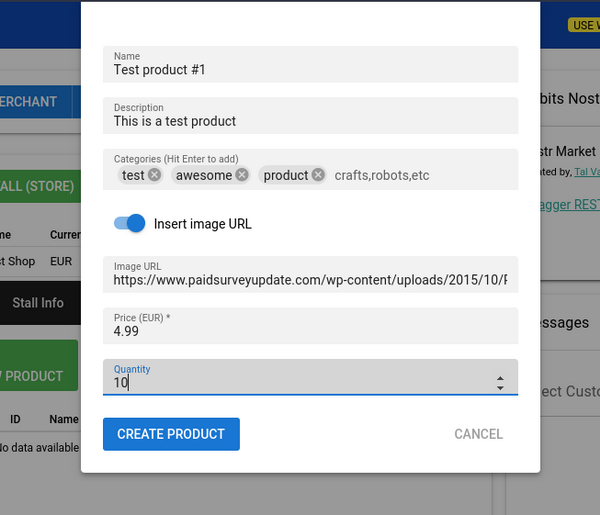
- The product name
- Give it a description
- Add some categories (this can be used by clients to search for products, so add as many as can describe better your item)
- Supply an URL for your product image (it's recommended that the images are hosted outside of LNbits). You could use PostIMG.cc or any other CDN.
- A price for the product, in the currency selected for the shop (this will be converted to sats when a customer buys)
- The quantity you have in stock, for the product. This will update when orders are made/paid
On the Stall section you can also see (update or delete) the stall details in Stall Info tab

Create, update or delete products in Products tab
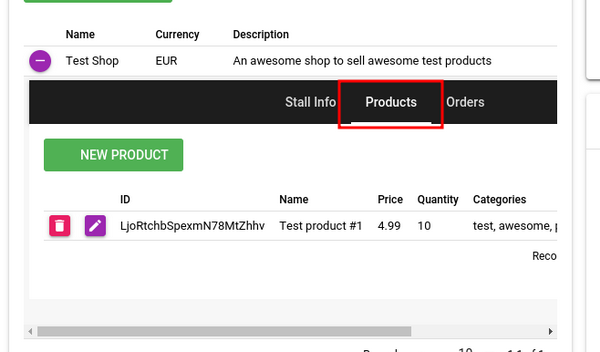
Done! Your Merchant Stall is ready to be visited by your customers.
To test locally your stall, open the link of the local Market page, located on the main page of NOSTR-Market, on the right-side panel:

This link will open a new tab like: http:127.0.0.1/nostrmarket/market or https://your-lnbits.domain.com/nostrmarket/market (if you access it in clearnet).
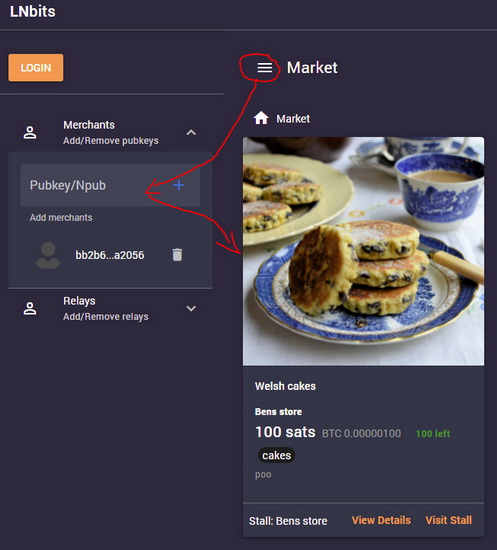
Click on the Market menu and go to Merchants. Then paste your merchant pubkey (see the beginning of this chapter about displaying / saving your pubkey).
Once you add your pubkey, your stall will be displayed and broadcast to the relays.
The Login button is to be used as of customer or as you the owner of the Stall or as with your personal NOSTR profile.
You could test your NOSTR Stall also from any other public NOSTR Market page, like https://market.nostr.com/ for example. You just have to add your pubkey into the “Merchants” section and done. Any of your customers can do the same procedure or from their own local LNbits instance if they have it.
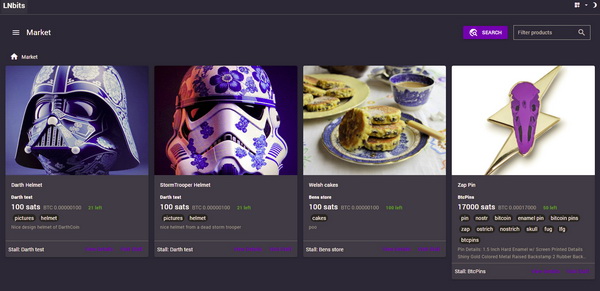
In a Market page you can add multiple merchants and shop from there directly. As you can see in the image above, are 3 different merchants, with their stalls and all accessed from a local LNbits instance, just by adding their pubkeys.
When you get an order, you can see the details by clicking on the "Plus" sign for the order.
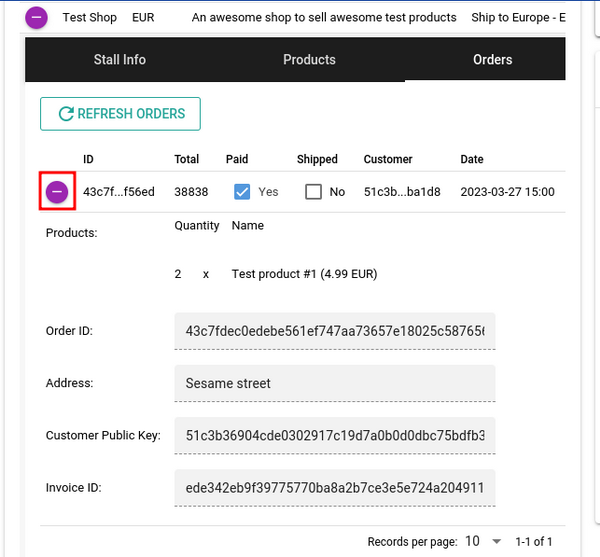
- Ordered products
- The order ID
- Customer's shipping address
- Customer's public key
- Invoice ID
If applicable, you can set as shipped when shipping is processed.
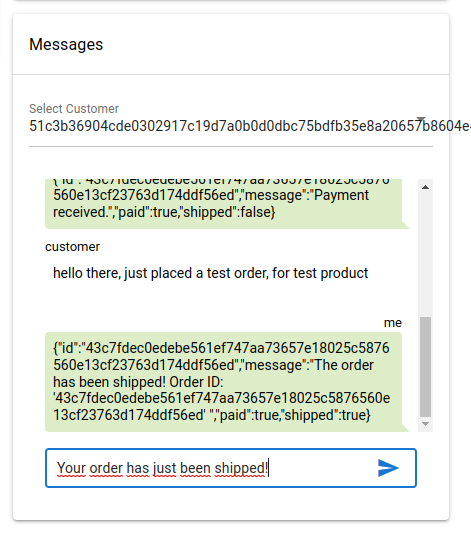
You also have a Chat Box to chat with customer and all these messages are done over NOSTR protocol, privately and encrypted.
AS A CUSTOMER
LNbits also provides a Nostr Market client app.
You can share with your customers the client URL from the merchant dashboard by clicking on the "Market client" link or by visiting https://your-LNbits-instance-URL/nostrmarket/market.
Or they can visit https://market.nostr.com/ for example and just add your Stall pubkey. Or even using the search box and put one of your specific tags.
If they already have a LNbits instance installed, they can even access it from a local URL like http://127.0.0.1/nostrmarket/market and adding the stall pubkey.