A simple step-by-step guide to install and use Alby Hub + Alby Go in a self-custodial way, with low resources and basic knowledge
 |
|
 |
|
 |
|
 |
|
 |
|
 |
|
 |
|
 |
|
Originally posted on Sep 26, 2024. Updated here on Dec 20, 2024
First of all, let’s answer this question that many newbies were asking me: What is Alby Hub?
Alby Hub, is a simple LN node interface, with nice NWC functionalities to connect various LN services and be used “on-the-go”. It is NOT a LN node in itself but is offering tools to manage the LN node behind. Is like LNbits or Zeus.
Yes, I know, Alby team already have a nice documentation page about this, their Github repository is also well documented (from there I was inspired too), but with this mini guide I want to bring this information to more people, especially to my readers that maybe will find a bit complicated to read all those instructions. Also my guide is dedicated to a specific setup, that few are talking about: the advanced mode setup.
Also BTC Session made a nice video tutorial, but that one also is taking the simple path of using the Alby Cloud and not the “advanced” path of managing yourself the LN node behind the Alby Hub.
So let’s get started with explaining the modes you can run Alby Hub:
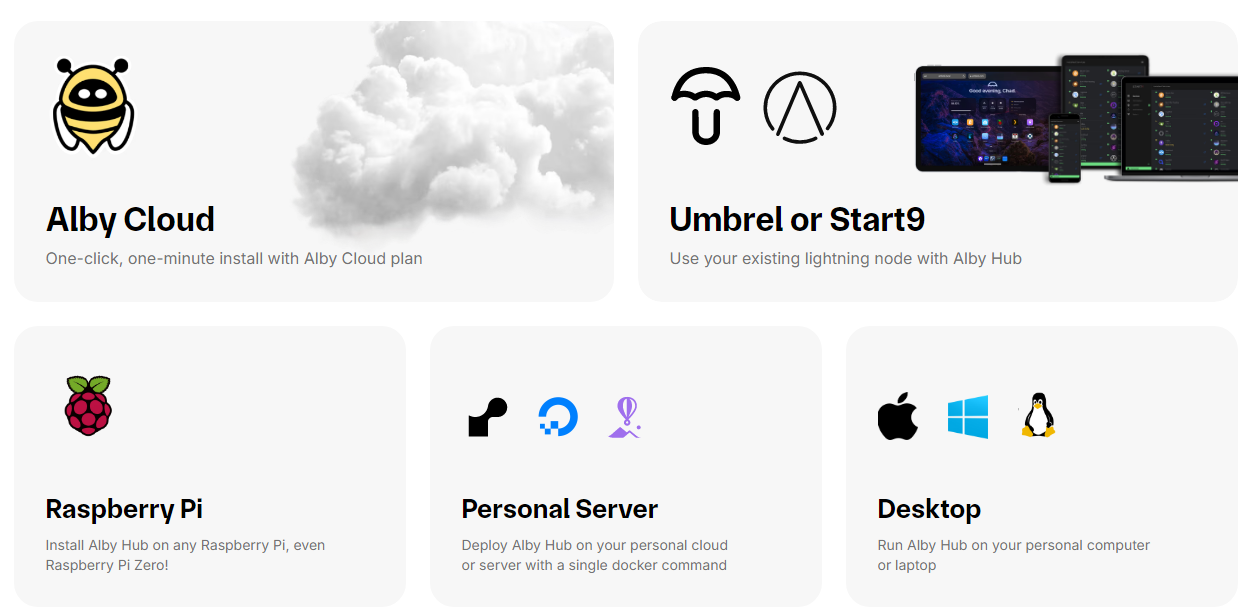
- using Alby Cloud, migrating your existing custodial Alby account
- using a VPS / hosting service with Alby Hub, pointing it to your home /remote LN node
- using a new account, running Alby Hub on your local PC, together with your own LN node. This method also could be run as standalone LN app or as a server, depending on how is your day to day usage.
I was testing (almost) all funding sources for Alby Hub and I will make a classification. I have to mention also that you can run it as a “private node” (not routing) or as a public node (routing) with some more complex steps. In this guide I will talk only about the “private” mode, mode that can be used by all newbies that are not so familiar with the complexities of running a publicly exposed node (domains, SSL certificates, router ports etc).
BASIC REQUIREMENTS
We consider you are a simple user, that do not have any (desktop) LN node, nothing, just want to run in a self-custodial way a simple LN node for your personal needs and maybe later giving some sub-accounts to your family and friends.
- a simple PC, even with 4 GB RAM, recommended Linux OS. Alby Hub works also on Windows machines, but I will not recommend that.
- some basic knowledge of running some command lines in Linux Terminal. Is just copy/paste in fact.
- a mobile phone to connect Alby Go.
SETUP STEPS
STEP 1 - Prepare the OS
Install Linux on that PC, I would recommend DebianOS (is more stable, if you want to dedicate that machine only to Alby HUB + LN node), but works on any other Linux distribution, even if you have a normal Linux Mint desktop could work perfectly fine. So use whatever other Linux you like.
STEP 2 - PREPARE ALBY FUNDING SOURCE
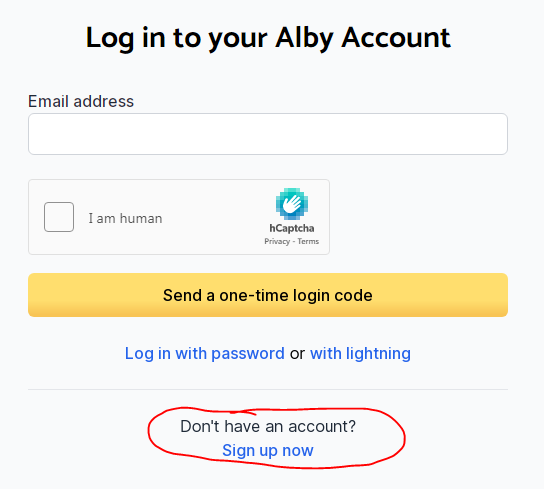
Start here: https://albyhub.com/ and choose “do it yourself”. Then you will be redirected to login with an existing Alby account (if you want to migrate it to self-custodial) or create a new one, to start a separate one with your new self-custodial instance.
Just create a new one and you will get an invitation code for running your Alby Hub.
Go to “Desktop setup” instructions and download the executable file for the OS you are using. No need to install anything, just run the executable file.
Once you start Alby Hub app, you will be prompted to input an invitation code. If you already have an Alby account (custodial) you can get it from there, but remember that you will migrate everything to your new self-hosted Alby Hub. I would suggest to start with a new Alby registration and once you are asked what type of account you want you can choose self-hosted and get that invitation code, that later you will have to input in the setup of your Alby Hub. Later you can change or personalize the LN address and even use your own domain for that.
Alby Hub is offering a variety of funding sources that you can choose first time you start it. A very easy to use GUI interface, that help you to connect instantly with your LN node behind (funding source).
Reminder: We are talking here ONLY about using the “private node” mode, not public.
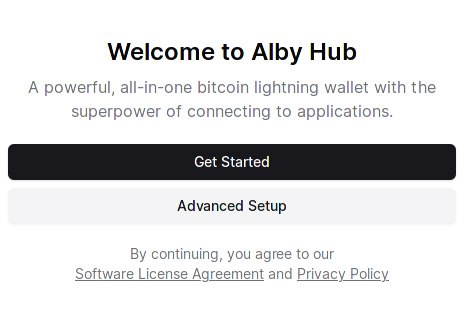
Once you start Alby Hub, you will be prompted with this screen, where you have to choose “Advanced setup” if you do not want to use the Alby Cloud option:
Then you will be prompted to choose one of the backend funding source:
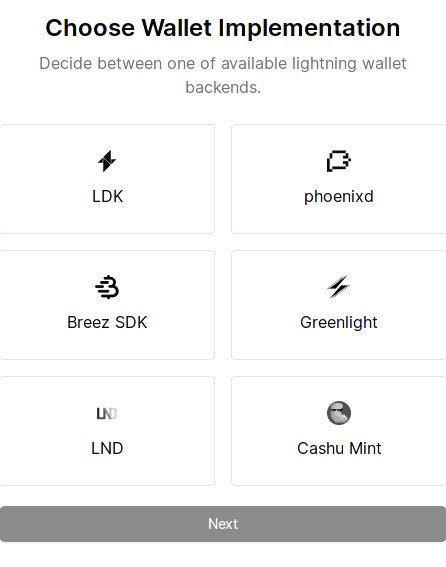
LDK backend
The simplest one and straight forward. If you choose that one, it will install automatically a LDK node instance and start right away, going to open one or many channels with the LSPs offered or any other node peer you like. LDK will not use so many resources, being a lightweight LN implementation. Also do not need to run beside a full bitcoin core node, it uses public Esplora servers. If you want to run your personal Esplora server, you have that option too, but you need to dig more into CLI configurations.
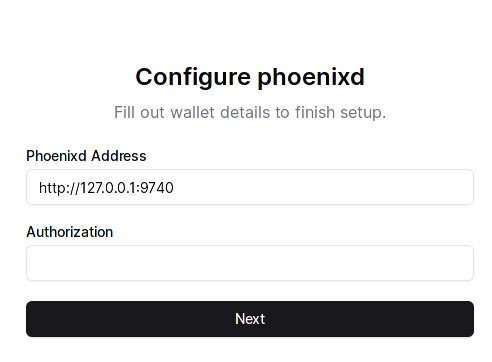
Phoenixd backend
Another simple and straight forward funding source for Alby Hub. Only that this one will use the “walled garden” liquidity from Acinq and will charge the 1% fees for that. If you do not want to deal with channels node management, this is a perfect solution.
Installation of phoenixd is quite simple, just follow these simple command lines: https://phoenix.acinq.co/server/get-started
Once phoneixd is up and running go to Alby Hub and input the required authorization code for that local server:
LND backend
A more complex and robust funding source, that require previous installation before you want to link it to your Alby Hub. Would be nice if Alby team will include an automated installation of LND like the LDK.
What I would recommend is to install a LND instance in “neutrino mode” on the same machine where are you going to run Alby Hub. In this way you do not require to run also a heavy bitcoin core node, with full blocks that will eat up almost all the machine resources. And don’t worry, the “neutrino mode” is not a “privacy concern”, neutrino is only delivering blocks data filters, do not read any xpub or addresses, IPs etc. It is used also by Zeus (embedded), Blixt, Breez.
Installing lnd from source
With the preliminary steps completed, to install lnd, lncli, and all related dependencies run the following commands:
git clone https://github.com/lightningnetwork/lnd
cd lnd
make install
The command above will install the current master branch of lnd. If you wish to install a tagged release of lnd (as the master branch can at times be unstable), then visit the release page to locate the latest release. Assuming the name of the release is v0.x.x, then you can compile this release from source with a small modification to the above command:
git clone https://github.com/lightningnetwork/lnd
cd lnd
git checkout v0.x.x
make install
For more details about installing and configuring LND instance please read here.
In that document you will also find the following lnd.conf configuration for neutrino mode:
bitcoin.node=neutrino
feeurl=https://nodes.lightning.computer/fees/v1/btc-fee-estimates.json
Once the LND is up and running, continue with backing the macaroons and TLS certificate required to connect Alby Hub, those will be necessary in this next step:
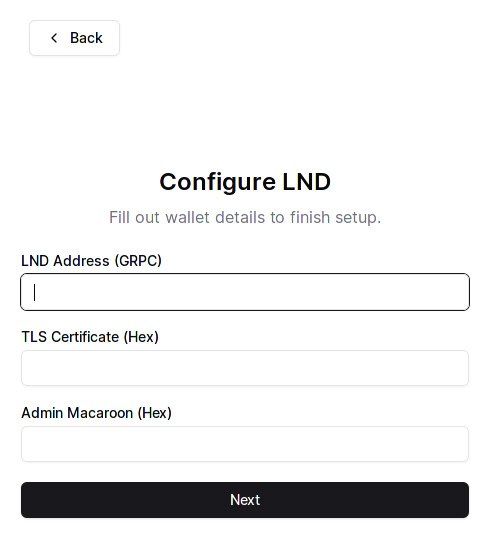
open Terminal and type:
xxd -ps -u -c 1000 /home/user/.lnd/tls.certYou will obtain a HEX code for your TLS certificate and paste it into the Alby Hub - "TLS Certificate box".
xxd -ps -u -c 1000 /path/to.macaroonYou will obtain a HEX code for your macaroon file and paste it into the Alby Hub - "Admin Macaroon box".
LND address - your local LND instance, eg. 127.0.0.1:10009
TLS Certificate - convert in HEX your tls.cert file
Admin Macaroon - convert in HEX your LND admin.macaroon
Cashu Mint backend
An interesting and damn simple connection as funding source. If you do not want to deal with all above LN nodes, channels management liquidity etc. this is one of the most straight forward and simple solutions.
YES, is custodial, but if you deal with small amounts, only for donations, nostr zaps, small payments etc, this is enough.
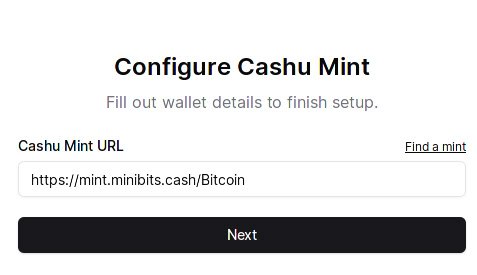
By default is offering the Minibits.cash mint, but you can use whatever other mint you like (see more here: https://bitcoinmints.com), or your own mint if you run one.
The only concerning part with this funding source is that there’s no way to have backup the tokens or keys for this funding source. Not yet, I am sure the Alby team is working on that. So if your Alby Hub get busted, you do not have a backup of the funds (or I couldn’t find it myself until now).
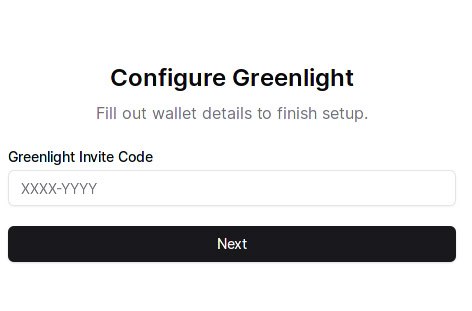
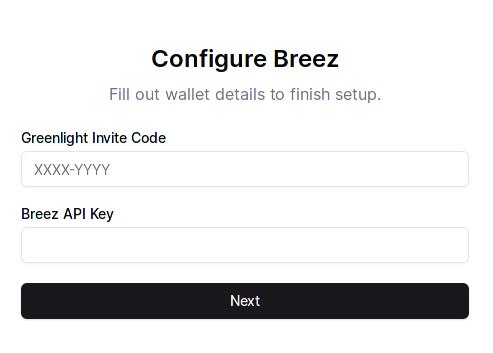
Greenlight / Breez SDK backend
This is a Greenlight funding source method, based on invitation code and a Breez API key. You can request them here. Greenlight is a “Lightning-as-a-service” node, where the user hold the keys but do not manage the channels liquidity and the server.
STEP 3 - START USING YOUR ALBY HUB
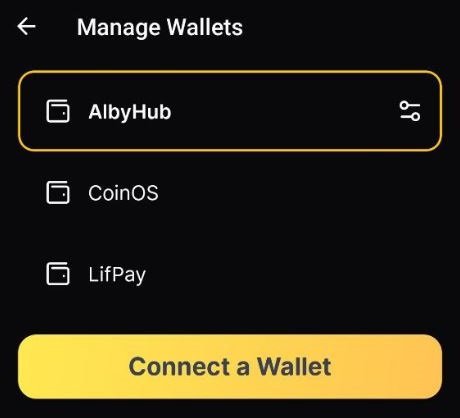
Aaaand that’s it! Once you connect a funding source, you are ready to go and use your Alby Hub, connecting it to various LN apps with NWC, connecting to Alby Go as a mobile wallet, create limited accounts or even act as “uncle Jim” with the special deployment of “Alby Jim”.
Just go to AlbyHub Apps, select Alby Go and then will show up a QR code to scan (is a NWC connection). Open up the Alby Go app on your mobile and scan that QR to add a new wallet. You can use Alby Go with many different funding sources that support NWC, as you can see in this demo I did.
Here I wrote a quick guide about using a "LN node for travelling" with a disposable Rizful LN node + Alby Go, that takes just 5 min to setup.
The variety of apps connections is incredible and easy to setup with provided instructions in the interface.
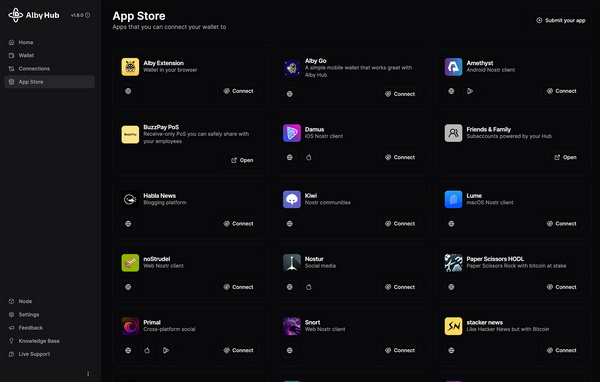
Also you can add your AlbyHub wallet into Alby desktop browser extension, together with many other sources, for easy access and zap directly from your desktop browser. Remember also that each account in Alby extension could be a separate NOSTR login, with its own keys (generated or imported).
MORE RESOURCES:
- Deploy it yourself - Alby Github instructions if you want to run it as server
- A very nice guide about configuring and connecting Alby Hub to Stacker News acccount
- Run your Alby Hub with Nodana (hosting service)
- Run your Alby Hub with Alby Cloud (hosting service)
- Create sub-accounts for your family members or friends on your Alby Hub