How to use TailsOS on a USB stick, with Electrum and KeePass, building your own cold wallet
 |
|
 |
|
 |
|
 |
|
 |
|
 |
|
 |
|
 |
|
Originally posted on Substack on Dec 30, 2021
Updated here on Dec 20, 2024
Many new BTC users asked me to write this guide, about how to create your own cold wallet and not using a hardware wallet. So I will describe here how to use TailsOS on a USB stick, with Electrum and KeePass (also have built in password generator).
This storing method is for those users that are comfortable with using computers, systems and already have a base knowledge about Bitcoin.
This method IT IS NOT for those very new to this technology and are not so techy. For those I recommend to just buy a hardware wallet and forget about this method.
Important aspects about cold wallets:
- a cold wallet always have to have at least a copy (even in another form of backup) and stored in another geographic place. You never know what could happen.
- a cold wallet is NOT your day to day usage wallet! As I explained here in his guide, you should keep your stash in three levels of wallets. Any cold/HODL wallet in whatever format you keep it, must be stored in a safe place, that nobody else knows and do not use it. To deposit to that same wallet, you need only few BTC addresses and/or MPK/Xpub key imported into a "watch-only" wallet app. Watch-only means that the private keys will never touch online world, you can only deposit to that wallet and check the balance. Here is a guide how to use "watch-only" wallets.
- a cold wallet can be accessed only when you really need to move funds from there (urgent matter) or you want to upgrade the wallet system, firmware, OS etc.
- always test recovery procedure BEFORE you put any funds in that wallet. Many times until you are comfortable with the process and you are sure you will be able to restore your wallet in case of SHTF. Practice is the key to proficiency.
Why I recommend this method, let's call it "Tails wallet" ?
There are many reasons from which we can mention:
- is dirty cheap (the only cost is the USB stick/s). So why not stacking more sats instead of buying (for some) expensive hardware wallets?
- TailsOS is a strong Debian Linux system OS, portable, with Tor built-in and many other useful apps.
- is not getting attention. Nobody will know that in a simple normal USB you can carry the keys to your HODL wallets. Instead of walking around with a Trezor, ledger, cold card etc, now everybody will recognize those are "carrying BTC", so you could be a target by default. In the past I saw users in a cafeteria pulling up their Trezor and connect it to a laptop, just to pay the bill. WRONG, totally wrong.
- Same USB OS can be used as emergency clean system for other tasks. Let's say you are traveling and you need a clean computer to use. TailsOS is great for that, just boot up with it and you have a read-only live clean OS. Accessing in a safe way your personal data, BTC wallets etc. And comes with a lot of simple useful tools.
- It can store multiple wallets, can be copied and stored in many different locations. It can be used also for storing more personal data (scanned documents, password manager, private stuff), all encrypted, safe from enemy eyes.
- Offers easy and fast access anytime to your cold wallets, without any additional software susceptible of malware, phishing, infected computers. TailsOS is ALWAYS CLEAN no matter which computer you use. Many users are losing wallet control because they are using them on infected computers and are sloppy with security.
Let's get started
A. Create and prepare your Tails Wallet
Download TailsOS, live USB, and use Rufus to create the bootable USB drive with TailsOS ISO image. Rufus will erase and format that USB drive.
Optional you can use the customized DTails suite (include more apps and tools).
- Boot with that USB drive (change the settings in the computer BIOS to start with USB drive or press F12 for some systems), and select RUN/Execute, not install, offline. This live OS already includes Electrum BTC wallet app and KeePass (password manager).
- If you plan to re-use this LiveUSB TailsOS, you can create also a hidden active partition, that will be encrypted, to save important information, like the KeePass database file, electrum wallet backup. Here are instruction how to use “Persistent Partition” and a video tutorial here. Put a strong password to open that persistent partition space and DON'T FORGET IT!
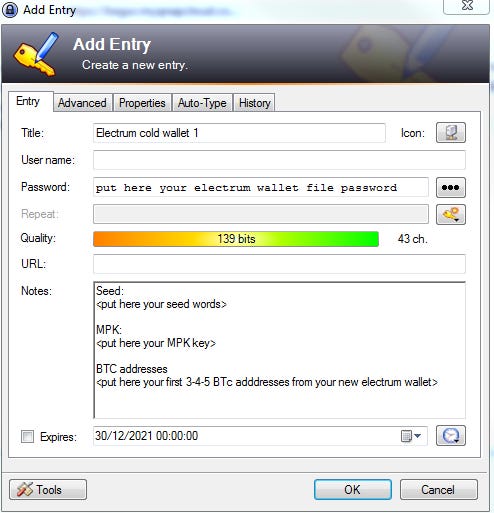
- Once you are done with persistent partition creation, open KeePass app and create a new passwords database. Save a copy on another USB memory and also use persistent encrypted space from Tails. In that database you start saving all your wallets (seed words, XPUB, BTC addresses, MPK) and other personal info. Don’t forget to make copies of this file in other safe places. Here is a guide how to use KeePass and sync across devices.
- If you want to use a latest version of Electrum and not the already installed Tails version, you can download the AppImage (for linux) directly from Electrum page https://electrum.org/#download
- and save it into your persistent partition. You just need to launch it, no need to install it. But any version of Electrum from Tails is enough for creating an offline wallet. Latest version is needed only if you want to use Tails to broadcast a transaction from that cold wallet.
- Open Electrum app and create a new wallet. Save the seed words into your KeePass file. Once is created, go to Electrum menu - wallet information - copy the MPK (Master Public Key) and save it into your KeePass database (where you saved the seed too). Go to menu - activate view addresses, then go to Addresses tab and copy 3-4-5 addresses and put them into your Keepass file. Later will be used for restore procedure test.
DONE! You just created your cold wallet in TailsOS. Close all apps and shut down your TailsOS.
OPTIONAL you can download and save in your persistent partition the Sparrow wallet app if you want to use a more advanced and a Taproot supporting type of address, as I explained in this guide. Almost same procedures to follow for creating wallet, saving backup and keys as for Electrum app.
B. Test restore wallet procedure
- Start again TailsOS, unlock the persistent partition, to be able to open your KeePass database file.
- Open Electrum app, select restore wallet, I already have seed and then follow the instructions step by step. Select segwit native and also the option button for BIP39 seed. See more details about using Electrum app here.
- Open your KeePass and the entry for your Electrum wallet details.
- Put the seed words to restore and check them one by one.
- Once the restore process is done, wallet is loaded, go to menu - activate "view addresses", then go to Addresses tab and check the first 3-4 addresses generated that are the same you saved in your KeePass file. If are the same, you've just done a correct restoration of your wallet. Optional you can check also the MPK if is the same, see menu - wallet information.
Done! Now you are good to go, you can deposit funds into your cold wallet. You can use the MPK in a watch-only app or just using few BTC addresses from your wallet.
C. Make backups and copies of that wallet!
OK now that you test the restore procedure, you deposit some funds into that wallet, is time to make security copies.
- Open TailsOS, open Electrum wallet
- Go to menu File - Backup wallet. Save that wallet file copy into your persistent partition and also in another encrypted USB as a copy together with a copy of your KeePass database file. Here are some guides how to encrypt a USB drive, with Windows and with Linux.
- The copy of that Electrum wallet is encrypted also with your Electrum password you put it when you create first time that wallet. That password is also used when you have to broadcast a tx, for the signing process. So, keep in mind it is very important, save it also in your KeePass file.
- So now, you can just open that wallet file with Electrum app, without having to restore from seed, will just ask you to open it with your Electrum password to decrypt the file. Seed will be necessary only in case this file get corrupted or lost. This file also contain all txs you've made, labels, history and in time can get bigger.
- In the USB drive copy (encrypted) you can store many other files too, like a picture file that embed a seed using steganography, private documents, anything digital that is important for you. Make more copies of this "private offline storage" and save them in different locations. Optional you can put them into a metal recipient, protected from EMF, water, sun, heat etc.
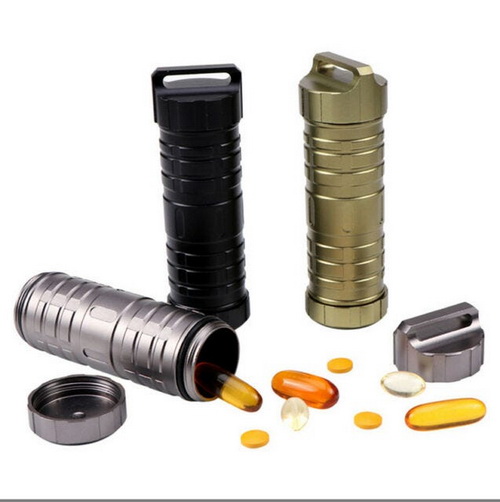
Here is a link to buy those recipients and USB memory.
D. Use it as a "watch-only" wallet
Here is a more detailed guide how to import and use the MPK of this cold wallet into an app for deposit only wallet.
Fun fact:
I have several recipients like these hidden into deep forest / mountain places, easy (for me) to recover them in any SHTF case. Even if are found by somebody else (I really doubt it) cannot be accessed due to hard encryption. I am very comfortable with that encryption and the secret place where are hidden. But is up to each individual where and how to save those copies. Also could be in an online storage, is enough that KeePass file to be stored and optional a copy of your electrum wallet file (no more than few hundreds kb of data).
E. Bitcoin-Safe as an alternative cold wallet solution
Everything described above works well, but it requires juggling TailsOS, Electrum, and KeePass separately. If you already have a dedicated clean machine — or are willing to set one up — Bitcoin-Safe is a modern, open-source desktop Bitcoin wallet that covers all of this in a single app, with a cleaner workflow and more powerful cold storage options.
Bitcoin-Safe runs on Windows, Mac, and Linux. It supports Taproot (P2TR) from the start, has UTXO labeling built-in (so you can drop the separate KeePass wallet entries for address tracking), connects to your own Bitcoin Core node or Electrum server, and includes a dedicated multisig wizard. Most importantly for cold storage: it handles the full PSBT airgap signing workflow — the same principle as TailsOS — but with a proper GUI.
Option 1 – Software cold wallet on a dedicated offline machine
The principle is identical to the TailsOS method: use a machine that never goes online and only use it to sign transactions.
- Take a second-hand laptop, install a clean Linux (e.g. Linux Mint) and never connect it to the internet. This is your signing machine.
- Install Bitcoin-Safe on that offline machine.
- Create a new Single-Signature wallet in Bitcoin-Safe, save the seed words in KeePass and write them on paper (two copies, two locations).
- Export the wallet's xpub/zpub (Wallet → Information → Master Public Key).
- On your online machine, install Bitcoin-Safe again and import that xpub as a Watch-only wallet. This is your deposit and monitoring interface — private keys never leave the offline machine.
- To spend: create a PSBT (partially signed Bitcoin transaction) on the online watch-only wallet → transfer it to the offline machine via USB → sign it with Bitcoin-Safe on the offline machine → bring the signed PSBT back to the online machine → broadcast.
Your private keys never touch an internet-connected device. Same security model as TailsOS, better UX.
Option 2 – Hardware wallet cold storage (recommended upgrade)
If you want to move beyond a pure software cold wallet, Bitcoin-Safe has native support for all major hardware wallets: Trezor, Ledger, ColdCard, Jade, BitBox02, Foundation Passport.
- Get a hardware wallet of your choice and set it up (generate seed on the device, write it down, keep it offline and safe).
- Install Bitcoin-Safe on your online machine.
- Connect your hardware wallet and import it into Bitcoin-Safe. The xpub is read automatically — private keys never leave the device.
- Use Bitcoin-Safe as your watch-only + signing interface: it will request hardware wallet confirmation for every transaction.
The hardware wallet IS the cold storage. Bitcoin-Safe is the interface. Clean separation.
Option 3 – Multisig cold wallet (maximum security for serious HODLers)
For large stacks, a single point of failure is unacceptable. Bitcoin-Safe has a dedicated multisig setup wizard that makes 2-of-3 multisig straightforward — no command line, no config files.
- Get two or three hardware wallets (can be different brands for extra resilience).
- Open Bitcoin-Safe and start the multisig wizard.
- Add each hardware wallet as a co-signer. Bitcoin-Safe collects the xpubs and builds the multisig descriptor.
- Save the wallet descriptor in your KeePass file and as a plain text backup — you need it to recover the multisig later.
- To sign a transaction, Bitcoin-Safe creates a PSBT and you sign it with any 2 of your 3 devices.
This is the gold standard for HODL cold storage. Any single device can be lost, stolen, or destroyed and your funds remain fully recoverable with the remaining two.
My advice: if you are setting up a fresh HODL cold wallet today, use Bitcoin-Safe with at least one hardware wallet, with Taproot addresses, and consider multisig if your stack justifies it. Read here the guide about migrating to Taproot.