How to create and use a wallet only for deposits (HODL)

 |
|
 |
|
 |
|
 |
|
 |
|
 |
|
 |
|
 |
|
Originally posted on Substack on Dec 05, 2021
Updated here on Dec 20, 2024
OK, let’s consider that a Bitcoin user want to have a BTC wallet only for deposits, not being able to spend from, just to keep it for long term HODLing.
Yes, a simple way is to use a hardware wallet (HWW) but what about to not bring too much attention, just to have a hidden way. A well known HWW could bring attention from somebody else that knows what are those and that could have lots of BTC.
I am going to explain how to have a wallet ONLY to receive BTC, in a very simple and effective way. It is about having a shared wallet between a PC and a mobile, with functionalities only to receive on the mobile. This “watch-only” wallet can also be on an old mobile, without internet connection. It would be used only be to generate the QR / address to receive / deposit.
OPTION A – Run from a live TailsOS USB OS
This option could be also used as your hidden cold wallet, or a system OS + wallet to be used in emergency mode. You can put that USB in a metal recipient to keep it safe and hide it in a safe place, that only you would know where is it. In this way, even if you are attacked in your own house, you will not have with you any option to be robbed, a watch-only wallet is useless if they found with you.
- Download TailsOS, live USB, and use Rufus to create the bootable USB drive with TailsOS ISO image.
- Boot with that USB drive (change the settings in the computer BIOS), and select RUN/Execute, not install, offline. This live OS already includes Electrum wallet and KeePass.
- If you plan to re-use this LiveUSB TailsOS, you can create also a hidden active partition, that will be encrypted, to save important information, like the KeePass database file, electrum wallet backup. Here are instruction how to use “Persitent Partition” and a video tutorial here.
- Open KeePass app and create a new passwords database. Save it on another USB memory or you can also use persistent encrypted space from Tails. In that database you start saving all your wallets and personal info. Don’t forget to make copies of this file in other safe places.
- Open Electrum app and create a new wallet.
- Save the seed into your KeePass file
- Once the wallet is created, go to Electrum menu – Wallet – Information. Copy the MPK (Master Public Key) into your KeePass file.
- Also is better o save 1-2 BTC addresses. So go again to menu – View – Show Addresses, then go to the new tab “addresses” and copy 1-2 BTC addresses into your KeePass file, together with your wallet info (in the notes box).
Done, you’ve created and saved an offline BTC wallet. You can go to point 11.
OPTION B – Generate a wallet from a Windows or Linux PC.
- If you run a Windows machine it is recommended to check it before, to not have any malware or keylogger. The basic Malwarebytes (free) would be good enough for a preliminary scan.
- Download Electrum wallet for PC (Windows or Linux)
- Run the Electrum installation without internet, just to create the wallet. Electrum does not need a connection to generate the wallet.
- Create a new wallet, we are going to name it “Sentinel” to identify it easier later, when making a backup copy of this wallet.
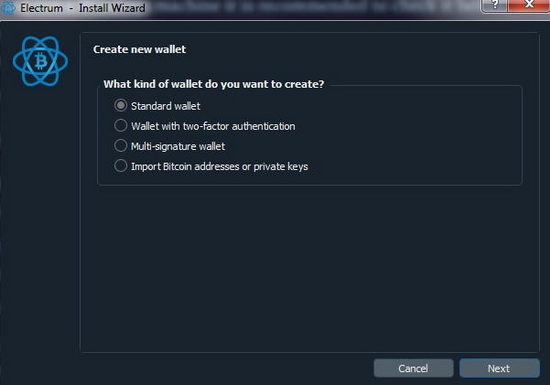
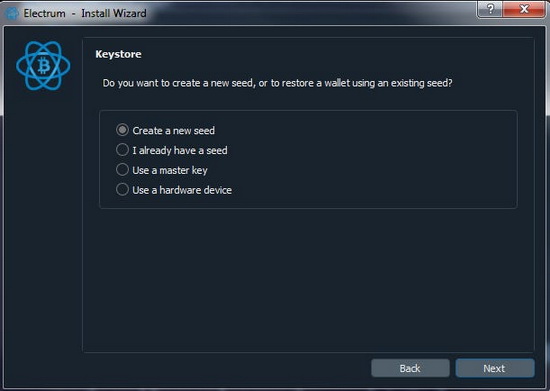
- Select “standard wallet” and then “create seed“
- It generates the seed for us and we save these words (write them on a paper or save in a file / USB / password manager)
- You have to put it word by word, to verify if you have saved it correct.
- Create a password for the wallet. NOTICE: write this password in your password manager / file along with your seed. This password is used to OPEN this Electrum wallet and asks for it when you make transactions (send).
- Ready! Now you can connect the PC to the Internet connection. The wallet is ready to receive BTC. You can enter “Tools – Settings” and activate the most used options. In Lightning we don’t change anything.
- From the menu, under “View”, activate all the options: “Addresses, Currencies, Channels, Contacts”. Console is for advanced users only.
- We open the “Addresses” tab to see the addresses generated and note the first one that comes out for verification with Sentinel / Electrum / Bluewallet / Nunchuck mobile wallet app. You can save the first 5-10 BTC addresses together with the seed, in the same file / password manager, to have a reference or simply have it as a BTC contact, without having to open the wallet (as an email address in your contacts)
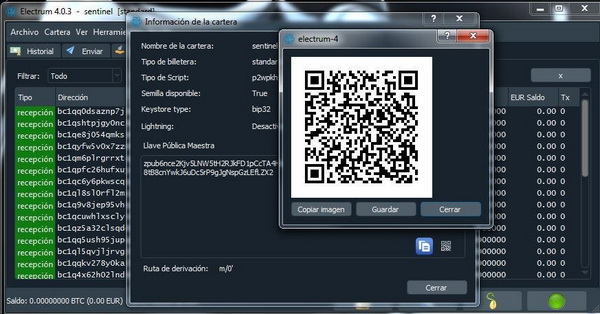
- From the menu, we open “Wallet – Information” and we get a window with details of the wallet. From here you can also activate LN (Lightning network) for this wallet, later if necessary. But for now we focus on obtaining the MPK (master public key, zpub).
- MPK = a master public key, which can be connected in a simple and secure way to a wallet app ONLY to receive, which generates the same BTC addresses and synchronizes the wallet in any app that supports zpub format.
- you can use the long code zpub or also scan the QR code.
- You can save this information (QR / code) together where you have saved the seed, for reference, in case you need it another time
- On your mobile, there are many wallet apps that you could use as “watch-only” type of wallet. For example, download the Sentinel app (they are the same developers who have made the Samourai wallet). At the moment it is only for Android. You can also use BlueWallet watch only for iOS / Android. Other apps could be Electrum mobile, Green Wallet or Nunchuck.
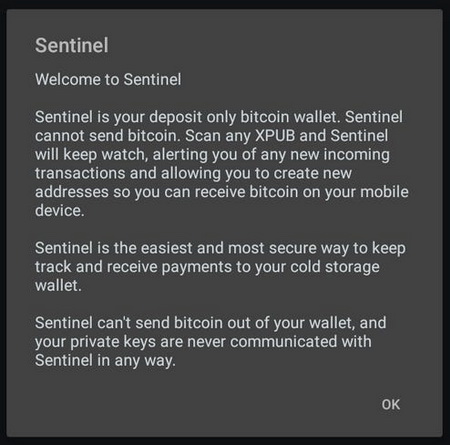
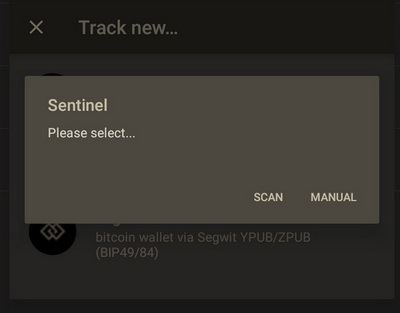
Once downloaded, we begin to connect the wallet zpub with Sentinel / Bluewallet / Electrum mobile/ Nunchuck. This is an example using Sentinel mobile app.
Next step is to introduce the zpub. We have the option to scan the QR or enter / paste the zpub code.
Verify that we have the same wallet / addresses as in Electrum. We click on the button below – Deposit and then a screen appears to receive, with the QR and the BTC address.
- Optionally recommended to have an alternative copy of the Electrum wallet file: in Electrum, up in Menu – File – Backup and save the file in a safe place (not on the same PC!), An encrypted USB pendrive, external security disk, even it can be attached to the password manager program, along with the seed, for more security.
- A demo video on how to use Bluewallet in read-only mode, here
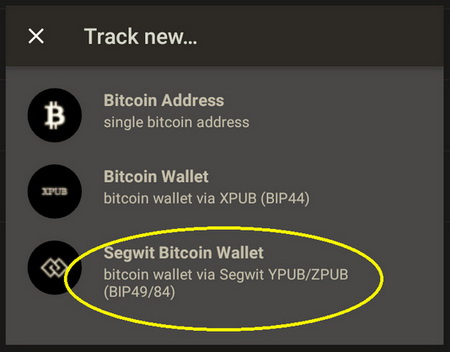
Will ask for the type of wallet we connect and we select Segwit.
If you have the Electrum open with the information about the wallet, it is easier to scan the QR code.
Ready. We put a name to the watch only wallet (Electrum to make it easier to identify where the funds come from).
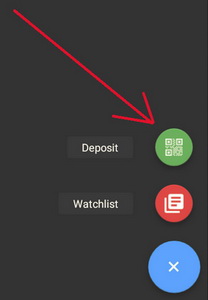
Verify that it corresponds to the same address (usually the first in the list) that appears in Electrum. If everything is correct, then you already have a watch-only wallet. Every time you want to receive, you click this button and Sentinel connects to your Electrum wallet through the zpub.
You can use these apps as “watch-only” wallets:
- On desktop PC: Electrum | Sparrow | Bluewallet (MacOS) | Green | Nunchuck
- On mobile: Electrum, Bluewallet, Sentinel, Green, Nunchuck
Done. From now on, you could use this “watch-only” wallet only when you need to deposit some BTC. Even if you lose your mobile device, it is not a problem, nobody can spend from there, but hey they can deposit to your wallet if they want :)
You can always go and open your TailsOS USB open your Electrum wallet and have full control of your wallet anytime, anywhere, with a clean OS.